Maya Animation and Lighting

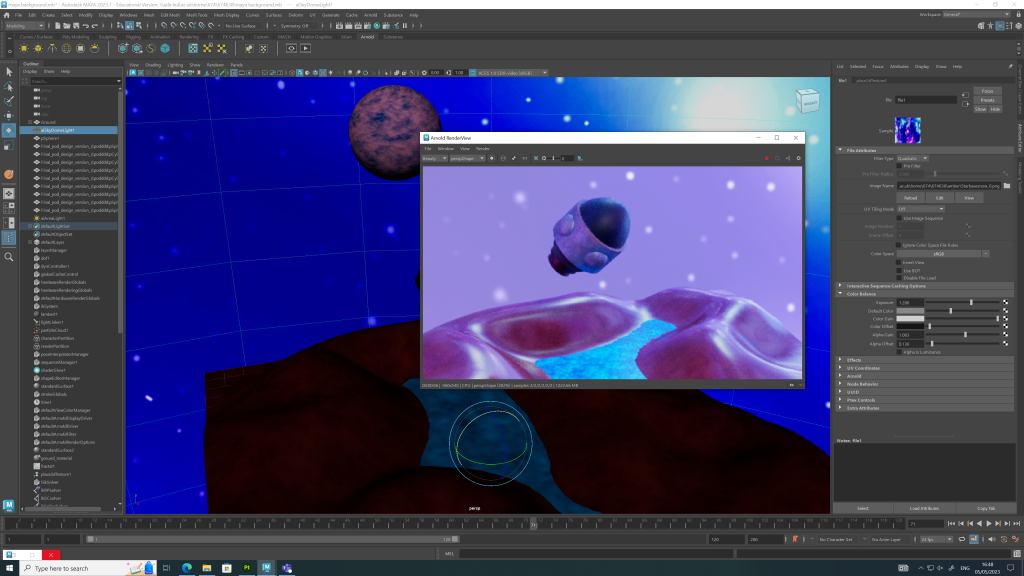
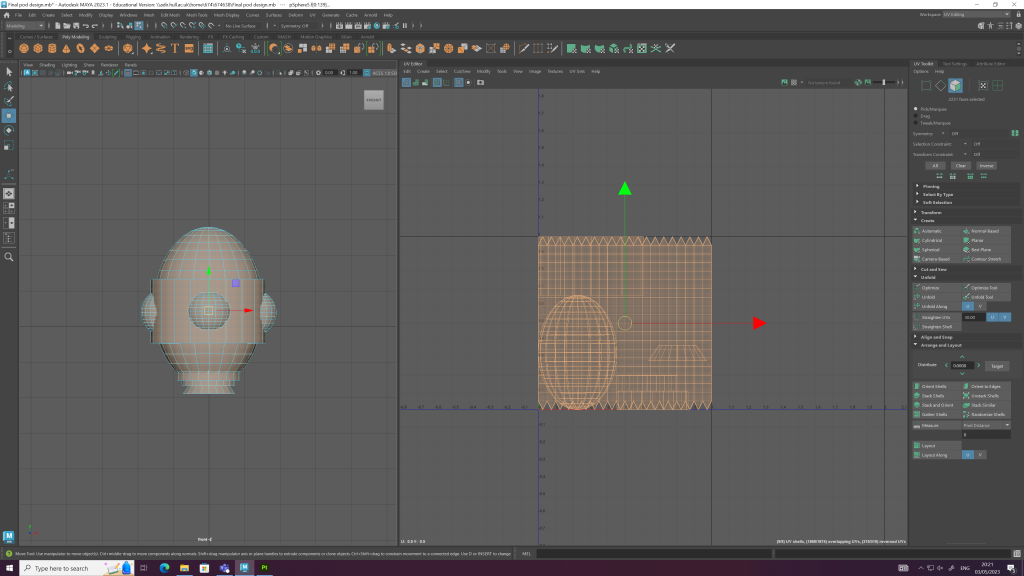
Introduction This blog post aims to design and produce a space environment for the escape pod and an animated sequence in Maya. Space Environment Design Development The below images show the design development process of the space environment and lighting setup in Autodesk Maya. The environment was designed using flat planes and textures which were manipulated to form shapes that represented hills and lakes. The process of building the environment provided experience and valuable Maya knowledge which can be used when designing future Maya projects. After building the environment, lighting was added to bring the scene to life. The addition of the sky dome light made it easy to manipulate the lighting to frame the space pod in a space environment. Adjusting the lighting settings, I was able to manipulate the colour hues to form a blue tinted background.   Animation Storyboard The storyboard below shows the space escape pod flying across the environment and crashing down behind a hill. Final Rendered Animation Reflection Reflecting on this task and assignment, I have learned a lot about Autodesk Maya and 3D animation. The new knowledge will aid me when designing my final metamorphosis animation for my design portfolio. Throughout my blog posts there is evidence of when things went wrong and how I struggled with certain tasks such as applying a texture from Substance Painter onto my model, which when applied looked distorted. I had to change different settings to fix the problem. Being presented with these setbacks I have learnt how to resolve issues, that have made me more confident in my ability to design using the 3D software.

Maya Animation and Lighting Read More »

Maya Texturing and Concept Rendering

Introduction This blog post aims to create a custom texture for the space-based escape pod in Adobe Substance Painter. U.V Unwrapping in Maya Before I could create and apply textures to the escape pod it had to be U.V unwrapped. This process creates 2D unfolded versions of the pod which make it easier to apply colours and textures to the 3D model in Adobe Substance Painter. Below are images showing the process of U.V unwrapping using the automatic unwrap tool in Autodesk Maya. Once the model was unwrapped it displayed the 2D pieces in a composition which needed to be adjusted so that the pieces didn’t overlap. This was achieved by using the layout tool, which automatically finds the most logical layout composition. Once the U.V unwrapping process was complete I exported the file as an OBJ and imported it into Adobe Substance Painter. Model Texturing in Adobe Substance Painter The images below show the process of painting the 3D escape pod model in Adobe Substance Painter. I experimented with the interface and added different textures to the model. Once I had chosen the base texture of the model, I began to paint the surface using different brush techniques which produced different outcomes. I added rust and dints to the model to make it appear old and battered, which helped make the model look more realistic. Final Four Renders Reflection The U.V unwrapping and Substance Painting was difficult; it took me a long time to understand how U.V unwrapping works. I messed up a few times when trying to manually unwrap the model as I couldn’t understand how to cut certain edges and distinguish between the parts that needed to be separated. This led me to automatically unwrap the model for painting. Once I had to import the painted model back into Maya, I couldn’t understand why the model paint looked distorted when applied (as seen in Figure – 10). I later realised it was because I had ticked the automatic unwrapping box in Substance Painter. 

Maya Texturing and Concept Rendering Read More »

Maya Modelling

Introduction This blog post aims to develop a space-based escape pod in Maya, which demonstrates hard surface skills. The below research and initial sketches inspired the final escape pod design. Link to the Pinterest board – https://www.pinterest.co.uk/adalton1202/maya/ Initial Design Development of Space Pod in Maya Using the initial design sketches as a reference I began to construct the escape pod in Autodesk Maya. The images below show the progression of the first initial design development, from different perspectives. Developing this design, I became familiar with the software interface and learnt how to combine different shapes to create a finished design. The model shows an escape pod with two engines and lights around the bottom. Final Design Development of Space Pod in Maya The final design was developed using the initial sketches after the realisation of the first escape pod looked too much like a bin/buoy. The images below show the progression of the final modelling process. The final design was developed by manipulating different shapes and bringing them all together. The final model shows an escape pod with one engine and reinforcement details which would protect the pod in space. The final design will be U.V unwrapped and imported into Adobe Substance Painter where a custom colour and texture will be applied to bring the model to life. Reflection The Autodesk Maya modelling task provided me with an understanding of hard surface modelling techniques which will aid in the development of my design portfolio assignment. The software interface is advanced, and I found it difficult to get the hang of it at first. Although experimenting with different tools and techniques such as shape manipulation, I was able to understand the basics and design a space escape pod. 

Maya Modelling Read More »

Substance Stager

Introduction This blog post aims to sell a mystery box of Odd Socks using Adobe Substance Stager. The target audience includes anyone looking to purchase novelty gifts for any occasion, although the box is primarily aimed at young adults. Initial Design Sketches Development Process The development process is documented below and shows different stages throughout the design process and exportation. Adobe Substance Stager was used to showcase the mystery box, rendering 6 images and also experimenting with the turntable feature. Once rendering was finished, Premier Pro was used to put all the renders together to form an animated turntable shot. Product Renders The Odd Socks Mystery Box uses bright colours and bold typography to ensure it stands out on the shelf amongst other novelty gifts. The box is covered in mystery socks which communicates the overall goal of the product. Once the buyer opens the box they will be presented with three odd socks with fun designs. The reasoning behind the box of three is that it complements the concept of the odd socks, where the socks don’t come in pairs and the designs don’t match. Turntable Animation

Substance Stager Read More »

Animate

Introduction This blog post aims to develop a 15 – 30 second web-based infographic, advertising the new nightclub, The Block. The target audience for the nightclub is students and young adults. This will be communicated through the imagery and colours used throughout the online advert. Brand Design The conceptual logo was developed with the aim of incorporating a smiley face to appeal to the younger audience, the logo uses a youthful block typeface which has been manipulated to form a unique outcome. Animation Storyboard Animate Progression Animate was used to develop the online infographic the process can be seen in the screenshots below. The animation is based on a DJ deck which relates to the younger target audience and also provides an insight into the genres that will be on offer at the club. The tagline New Kids on the Block was used for advertising the club to new students whilst also incorporating the name of the venue. The DJ deck animation features a spinning turntable and flashing light to draw the audience in. The interactive elements are communicated through buttons on the deck which are highlighted in colour and with the brand icons. These buttons activate multiple pop-ups that display venue information. Final Animation Reflection The Animate activity provided me with an understanding of interactive animation. The process of making the interactivity work was difficult and tedious at times. Missing out on small details such as renaming the pop-ups and symbols resulted in the interactivity not working. I figured out that I was linking the wrong assets together as I didn’t take the time to rename each asset. Upon making amendments to each trigger I was able to link them to the correct asset and make the interactivity work.

Animate Read More »

Scroll to Top